Good evening, hope your all having a creative time wherever you are :-). I'm popping on today to show you my altered playing cards for a swap I am in. Lots of texture, bright funky paints and houses from deli paper. I have done a full step by step and all the products will be listed at the end of the post. Enjoy :-)
I would like to enter the following challenges :-
Our Creative Corner Challenge - picture below
More Mixed Media Challenge - Yellow (two of the altered playing cards are yellow)
A Bit More Time To Craft - Anything Goes
Craft Your Passion - Anything Goes
9 Altered Playing Cards for the
Mini Marvels Swap on Facebook
Lots of close ups :-)
And now for the Step by Step ;-
I started by adding texture paste to the cards using Mr Holtz stencil. Then
I gave it a good coat of gesso (map of cornwell was on the back lol)
I had an idea of using gelli prints/mop up paper to stamp on.
I knew I wanted houses as I have loads of stamps of them lol that I haven't
used yet. But then I saw the deli paper that had squares that I had punched out when
I was doing a mini mosaic canvas
HERE.
I love all the popping colours
I used some patterned paper and stuck the deli paper on top in pieces.
I used some other mop up card for the roofs.
Here we are, the mini houses all ready, but now I had to think of some colour
for the background. Initially I was going to do some sky but I let myself just
be free with my paints and in the end I went with MEGA COLOUR :-)
Now you may think this picture is random, but read on lol ......................
Here are the paints I chose first, I knew I wanted to get my brayer out so those
sheets you can see underneath are laminated sheets. I used different
colours for each i.e. all blues use the blue sheet. Its so helpful. Sometimes
I add white on there (even though I have a white one) but at least I know when
it's dry it will peel off.
My first colour chartreuse I painted all over the front.
Next I brayered on lime
then vivid lime green
Next white
Then I added neon green fluid paint with water.
Here is the blue finished
Next are the warm colours
Yellow
Orange
And pink seems to have disappeared but you can see it on this pic. Next I added some
black paint through a stencil.
Then some stamping
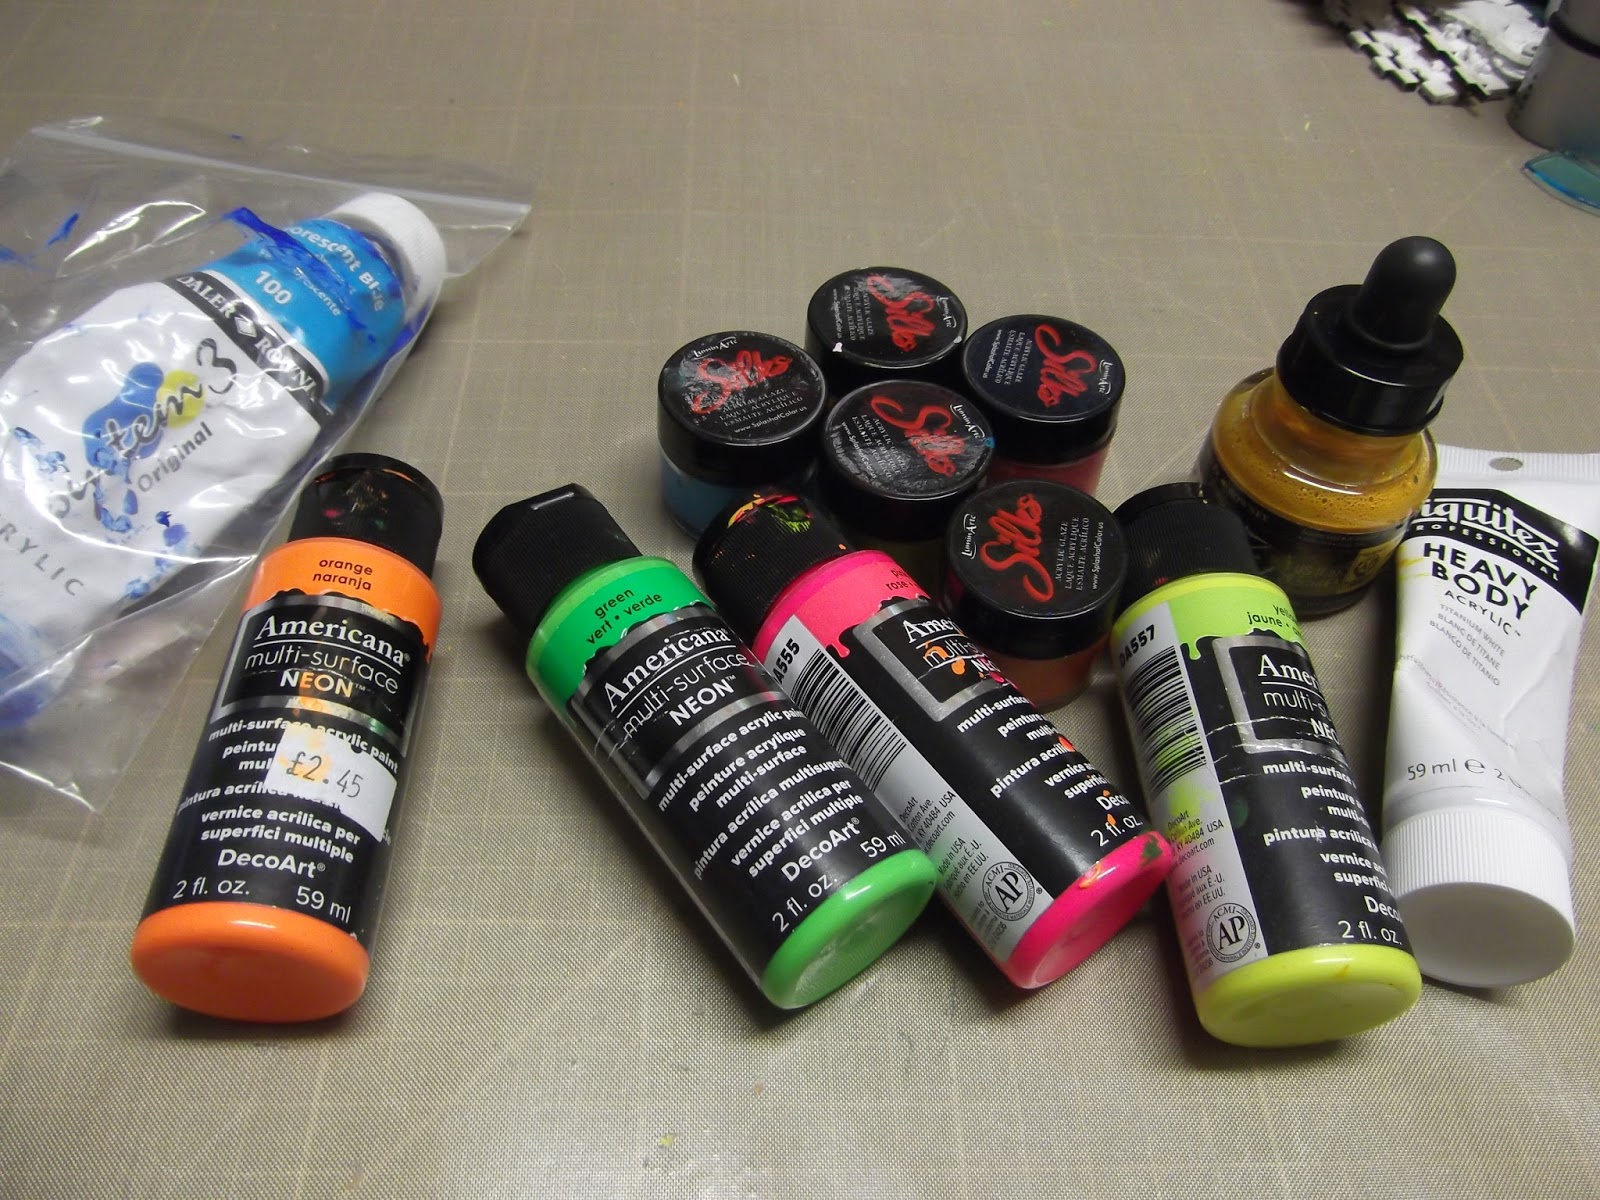
Now for the backs I used these paints. I bought the silks about a year and a half ago
and even though I haven't used them in a few months they have gone mega dried up
all the mica clumped together. I was able to add some water to help but all they are
useful now is for dripping :-(
Has anyone else had this problem? I never keep them in the sun.
Ooops I missed this picture for the front, some metallic ink splatter.
I wanted some of the playing card to show, first I stamped the sentiment and edged
with the neon green.
Next used neon paint with the brayer.
Some bubble wrap stamping with white paint (I love when I can bubble wrap stamp lol)
Dripping with silks
Some stamping
Some splattering
Orange
Pink
Yellow
Blue
Here are all the houses sorted onto which cards.
With my Winnie the Pooh Cuppa Tea :-)
Edging with a promarker, inkpad over the top to highlight the texture,
and some pen work around the windows.
All done and drying.
My clean up from this playing session, I wonder what this will be :-).
Hope you enjoyed my step by step today, thank you so much for taking the time to visit.
Happy Art :-)
Hugs Kezzy xxxxx
Product List
Stencils - Tim Holtz (bricked), The Crafter's Workshop (mini tiny circles)
Paint - Liquitex Heavy Body (cobalt teal, vivid lime green, mars black, titanium white, quinacridone magenta, indian yellow, pyrrole), Golden Highflow (fluorescent in green, blue, chartreuse, orange, pink), Dina Wakley (lime, lemon, tangerine), Kaisercolour (hot pink), Daler Rowney (fluorescent blue), Paperartsy (caribbean sea, mermaid, bubble gum, yellow submarine), Silks (mediterranean blue, key lime, apricot nectar, yellow rose, pink azalea), DecoArt - Americana Satin (chartreuse), Americana Neon (green, pink, yellow, orange), Media (cadmium orange hue).
Archival Ink Pads - jet black, dandelion, monarch orange, (dylusions) calypso teal, dirty martini, bubble gum.
Daler Rowney Pearlescent Liquid Acrylic - autumn gold
Mediums - Winsor & Newton Galeria (heavy carvable modelling paste), Prima (3D gel)
Stamps - Paperartsy HP1601
Patterned Paper - Docrafts (book print)
Pens - Promarker (black), Pilot (black No 1)
Left over scrap gelli prints and mop up pages.