Sunday 30 November 2014

Paperartsy Challenge - Oh Christmas Tree

Hi ya, yep another week has passed and not blogged. I'm afraid my back was so bad I have only been able to do a few bits. Good news is I had my injections on Friday so now in the must rest period. Not that it's a problem,  I was so bad that they had to give me lots of stuff to knock me out and I'm still sleeping it off. I have been now told that they will make sure that my injections will be within 3 to 4 months so I will never get this bad again.
So I have been working on this project for 3 weeks for the Paperartsy Challenge which I kept getting stuck on, then another designer did a project and I would get more inspiration and carry on. I finished it the day before I went in to hospital so I downloaded the pictures and popped them all on here. So now I can finally stay awake long enough I am writing it up on my Samsung tab.
This was inspired by the following designer's - Wanda Hentges who did an amazing journal page where she stamped into grunge paste and did areas of crackle inbetween.  This is how I did my background.  Ellen Vargo did some gorgeous clean and simple Christmas cards using the petal stamp from her stamp sets, this inspired me for my tree, more on that in a bit as I did lots to it to get it all sparkly (yep I went off on one again which seems always to happen so in the end I can't play in the challenge as it doesn't seem to have any of the designer left in it). Next Liz Borer did this wonderful project Here which made me pick gold for the presents and wording. And before that it was Gillian Simson who reminded me I had Darcys Christmas stamps from Ally Pally which gave me the decoration for the tree.
So hopefully even though my project looks so different I'm hoping that it can still be included.

So on to my project.  It is quite large and
done with all PA stamps and paints.
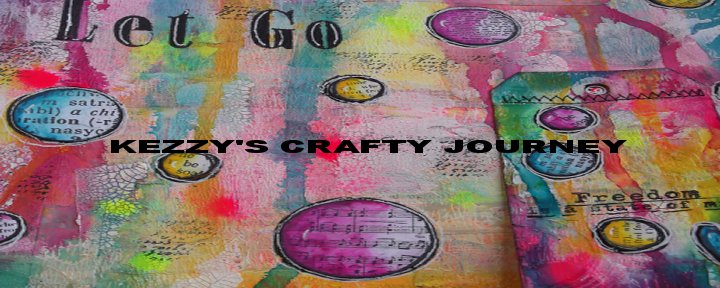
I have done lots of pics so you can sew all the
different things close up.


The background was spread with grunge paste and stamped
in areas with petal shape from EEV02. When dried I painted it
with Fresco paint tinned peas. Then I added PA crackle medium
in area and when dried I painted vintage lace over the
top. At the end of the project I highlighted the stamping in
grunge paste with Treasure Gold Green Amber and Gold.

The tree was the leaves from EEV04 stamped
on patterned paper that had been painted (pic lower) and the leaves was stamped with tinned peas and hyde park and immediately embossed with WOW clear powder.
Then PA metallic glaze mixed with some satin glaze was painted on top.
The decoration from EDY03 was stamped with plum paint and then immediately embossed with WOW hologram powder.
Gold stickles was added as tiny drops in the middle. Old Gold paint was splashed over and then I added scratchy lines with
a black journal pen. You can see closer pics further down.

The background tree was a bit of a last resort, it needed something extra so I used the pine stamp from ELB10 and
using tinned peas first I did all the stamping. Then I went back and stamped with hyde park, then the metallic glaze mixed with satin glaze and then fern green archival ink. There is a pic later on showing the end result of this. I then splashed old gold paint
and added dots of gold stickles.

The trunk was stamped on the same paper using a stamp from EEV01 with taupe, mud splat and french roast paint and again embossed. All the edges of the tree and trunk was distressed when cut out. The wood was painted with old gold with dabbing motion and then splashed with plum paint lots of it, then dabbed again wirh old gold. I found that (pic further down) that if you shook the bottle,  then added some to your mat and then dabbed in it lots of times gave you bubbles which gave great texture. I also added some doodling with my journal pens. 
The wood is from That Craft Place which I am doing projects for their packaging and the best bit is she would love me to use anything especially PA products.  This is where this project is going, all the way down to Eastbourne :-). 


The background was stamped with the stars from ELB10 woth plum and had the hologram embossing.  The script from ESN11 was stamped with archival plum, the holly swirl from Egg Nog 1 was stamped with archival fern green, the post stamp from Christmas Plate 3 was stamped with Brilliance galaxy gold. Then the hologram embossing powder was added in place.
A piece of PA card stock was painted with plum and then the word box from Egg Nog 1 was stamped and gold embossed a few times. I then cut out the words with there little boxes and added gold promarker around the edges and used a journal pen as well.


The wood star was paonted with plum and the whole star
was covered with the hologram embossing powder. Treasure gold gold was added around the edges and the scratchy lines on top.


This is how I started to plan, the background was finished. 

The background paper had a wash of vintage lace and metallic glaze.

This is the background tree finished. 


The bubbling of the gold, gorgeous texture. 

Right I shall be off. I'm hoping to be back in my craft room tomorrow for some easy crafting.  I have some unfinished bits to finish.  I also have some tutorials to add on here as well.  Thank you so much for taking the time to visit.
Happy Creating :-)
Hugs Kezzy xxxxx

Friday 21 November 2014

Summer Bling

Hi ya, I cannot believe it's been almost two weeks since I blogged.  I'm afraid most of it is due to lack of mojo which I think had something to do with my craft room not being finished, also trying to do videos while no mojo was difficult.  I did a practise video last weekend while doing some ATCs for swaps which took two days.  I haven't even worked out my editing yet.  Are you ready for this, I was shaking while videoing, seriously, I would be no good on tv lol.  Also I have been really bad with my back as my pain injections are late so struggling at the moment.  BUT the good news is my injections are next Friday, plus while feeling lack of mojo I finished the last bit of my craft room which was boring sorting out chipboard etc, but having to sit with my back it kept me busy, and at long last I am creating again.  There are still a few bits to do but that will now be in the new year.  I will show my craft room next Wednesday with lots of photos.
So I am showing this swap I did recently (end of summer) which we had to use a selection of photos to inspire us, I chose 4 which are near the step by step.  Now it's not the usual step by step as I missed some out as I remember taking it downstairs while I was cooking!!!
I would like to enter the following challenges -
Addicted to Stamps and more - Make your mark (I used paint, stamping, distress & stickles.
613 Avenue Create - Anything Goes with twist add a hello (look further down to the packaging and I used a little label saying hello.
The ABC Challenge - Xtra Special - I like use special charms when doing swaps, plus doing nice wrapping with little gifts (further down is picture).
Creative Knockouts - Bling is the thing - I used stickles, pearl glue, silks glaze and sequins.
Through The Craft Room Door - Anything Goes


Here is my tag, I am really really happy with how it came out,
I had lots of go's as I never do inspiration photos well but this time
I really am pleased.  I love the distress inks with the fresco paint which
gives lots of layers and depths, plus the sparkle and embossing.
I think I might make a journal page like this as it really does make me happy lol.


Here are the photos that I chose for inspiration.


And now for the step by step (ish seems I missed some lol).

I am terrible when it comes to choosing colours so I just went mad with
my distress inks picking lots of colours. (product details at bottom of page).

Splattering of water, I still love how distress reacts to water, I love to
splatter loads and watch the drops appear (ok I am a little sad eeek).

Next I stencilled some fresco paint, the amethyst is opaque so I mixed it with some satin
glaze to make it more translucent.

Some scrip stamping.

Some embossing.

I wanted to initially use the below stamp and had worked everything around it
so it would fit, hhhhhmmmmmmmm I completely forgot that
when I stamped it, it would be the opposite way so I had to go looking for another stamp.
I really love the one I chose in the end.  While I was cutting them out I made some circles out
of the leftover rubber for future use.

I did go a bit mad with the stamping and at one point I was going to
chuck it as it was too much, but with the bling it came out nice.
It's the background I still completely love.

Time to glaze it so I could add doodling later on.

I painted in the flower stems and then used a white journal pen and made
lots of dots, then I went downstairs to make dinner and took it with me to add
lots of Silks paint over the dots in the same colours of the tag.
Then all that was left was doodling with my journal pens, adding sequins and 
some stickles and liquid pearl.

Hope you enjoyed my tag today, I will be back Sunday with a wooden Christmas picture that has lots of grunge paste, paints, embossing, patterned papers and crackles.  Thank you so much for visiting and bearing with me during this time of lack of mojo.
Happy Creating :-)
Hugs Kezzy xxxxx

Products Used
Paperartsy Fresco Paints - limelight, amethyst, satin glaze
Distress Ink - scattered straw, tumbled glass, seedless preserve, ripe perismmon, dried marigold, wild honey, squeezed lemonade, mustard seed
Paperartsy Stencils - Lin Brown PS002 and PS005
Stamps - Paperartsy (words 4), Indigo Blu (stylise flowers), Chocolate Baroque (big flowers)
Ranger Multi Medium and Perfect Medium
Cosmic Shimmer - detail bright gold embossing powder
Archival - jet black, dandelion, red geranium
Silks - pink azalea, apricot nectar, yellow rose
Liquid Pearls - gold pearl
Stickles - fruit punch
Treasure Gold - white fire
Promarker black
Montana black pen and Sharpie white pen.